 Member Sponsored Content
The following article is brought to you by our premium members. These articles are co-authored with our education & action partner, Mobile Internet Resource Center (MIRC), who provides in-depth content and independent analysis on all things mobile internet.
Consider joining our membership for full access and to be part of the conversation in our support forums. Members also receive premium discounts on equipment, data plans as well as upgraded shipping! Learn more...
Table of Contents
- Products Covered
- Summary
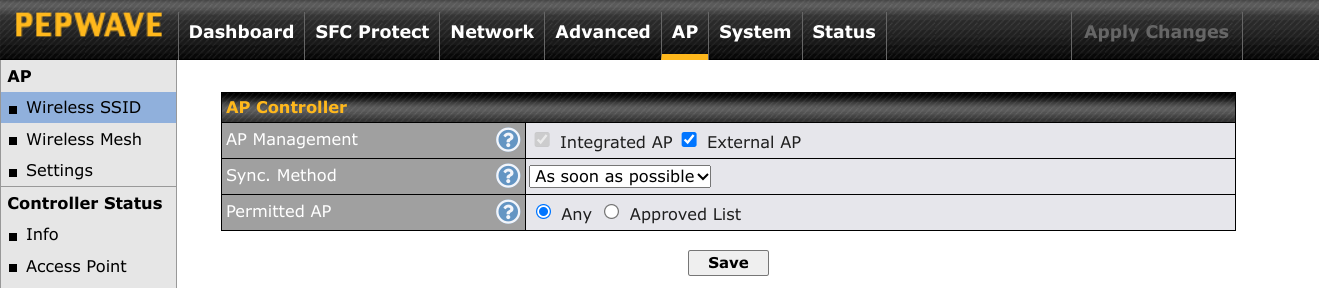
- Adding a Secondary Access Point
- Wireless Mesh/Wireless Uplink
- Requesting Assistance
Products Covered
- Peplink Max Transit, Max Transit DUO Routers
- Peplink Max ENT Routers
- Peplink Balance Series Mobile routers (menus and screenshots will vary)
- Other Peplink devices with AP Controller feature
Summary
In this article we will cover how to add secondary access points to Peplink mobile routers that have the AP Controller feature. This includes Peplink Transit series routers included in our Speed Demon, Road Warrior and Ultimate Road Warrior packages.
Peplink Max BR1 Mini or BR1 MK2 such as those included with our Essentials or Full-Timer Bundles are configured differently. You will want to follow a separate instructional article here: Adding Secondary Access Points (Peplink Max BR1 MINI/MK2)
Adding a Secondary Access Point
We have put together the following instructional video to explain how to add additional access points to your setup.
Written step-by-step instructions have been included below.
Wireless Mesh/Wireless Uplink
Once you have followed the video above in its entirety you can look at enabling Wireless Mesh/Upload which will allow your secondary access points to function without an ethernet cable back to your primary Peplink mobile router. The technology is referred to as Wireless Mesh or Wireless Uplink. To configure this feature follow our Wireless Mesh article, available below.
Requesting Assistance
If you feel you are not getting anywhere or there is another issue you can always reach out to our team directly by initiating a ticket here on the support portal or by emailing info@mobilemusthave.com
Thank you for being the best part of MobileMustHave.com!
Was this article helpful?
That’s Great!
Thank you for your feedback
Sorry! We couldn't be helpful
Thank you for your feedback
Feedback sent
We appreciate your effort and will try to fix the article